Sunday, February 28, 2010

He Is My Master: Sawatari Mitsuki 02

he is my master cosplay - sawatari mitsuki 02Izumi's younger sister who was also hired by Yoshitaka to become one of his maids, Mitsuki is an industrious young girl who, with the help of Yoshitaka's media archive, makes her older sister a "Net Idol". Izumi's popularity and Mitsuki's hard work, eventually allows Izumi to pay off her debt. Mitsuki also gains popularity and has her own fan club from her school and other schools as well.

Cute cosplay! I really love her expression in this photo. It's a bit similar to Orihime's isn't it? Thanks to Lila2021 for sending this in!

Saturday, February 27, 2010

Arisa Mizuhara Cosplay


Dejiko - DiGi Charat


Maga Oscura- Yu-Gi-Oh!


Belldandy- Oh! My Goddess


Edward Elric- Full Metal Alchemist


Inuyasha- Inuyasha


Shimako Toudou- Maria sama ga Miteru


Kagamine Len- Vocaloid2


Felicia- Darkstalkers


Pastel Ink- Moetan


Chii (pink)-Chobits

Name:水原ありさ Arisa Mizuhara

Nick:ありさ Arisa

Nationality:日本 japan

Occupation:銀行員 Banker

Birthday: 11.22

Height: 165cm

Favorite Color:赤/コバルトブルー Red/Cobalt blue

Favorite movie:ロードオブザリングシリーズ The Lord of the Rings

Band / artist favorite music:ラルクアンシエル/ユーロビート L'Arc〜en〜Ciel / EUROBEAT

Food and drink:コーヒー coffee

Hobby:コスプレ^-^ cosplay

Favorite anime series:銀魂/axispowersヘタリア gintama/Axis powers HETALIA

Favorite Manga:銀魂 gintama

How many costumes did you make?
約100コスチュームです。 About 100 costumes.


Which is your favorite one?
デジコ(デジキャラット) DEJIKO(Di Gi Charat.


How and how long are you in the world of cosplay?
約10年です。 About 10 years.

What is your inspiration to make cosplay?
好きなキャラクターを見て魅力を感じたらコスプレをします!^-^ When I see a anime and I like the character I usually make cosplay.


What was your first cosplay and why?
同人誌即売会で【デジコ】のコスプレをしている人がとてもキュートで!自分も【デジコ】の服を作ってみたくなりました。When I saw a cosplayer who was cosplaying [DEJIKO]in
the literary coterie magazine spot sale association, I wanted to tried it because it was very cute! So I want to make Dejiko cosplay.


Why do you make cosplay?
Because I like anime and make my own clothes.

When you make cosplay, do you really identify the character?
ほとんど自分の好きなキャラクターを優先してコスプレを実行しています。ただ、好きなキャラクターですが自分に似合わない場合は残念ですが諦めています。。>_<
Well, almost all the time I make costume play about a my favorite characters. But I give up about those characters who don't suit me though.


Do You think it's necessary to act like the character when you are making a cosplay? キャラクターの特徴的な動きや表情を演技することは大事だと思います。なるべくキャラクターになりきって写真を撮るように気をつけています。
I think is important to feature movement and the expression of the character. It is important to look as the character in the photographies.


Have you ever participated in cosplay contests?
いいえ。コンテストとか競い合うのは苦手なので出たことはありません。 No. I haven't ever been in contests, because it's not good.

Have you ever won on cosplay contests?
いいえ。参加していないので。 No.I haven't ever participate.

When you make your costumes, do you need some help?
たまに母や友達に手伝ってもらう時があります。
My mother and some friends occasionally help me.

Where do you buy your wigs and other accessories?
Wigs 【zephyr(http://www.rakuten.co.jp/zephyr1/)】 wig【シペラス(http://cyperous.com/)】

What is your favorite fabric? 化繊系の布地が使いやすいです。It calls 【chemical fiber】 system, because it's easy to use.

What was your last costume? 冥土へ誘うものアイリ【クイーンズブレイド】

What is your definition of "cosplayer"?
好きなキャラクターの服を作って楽しんでそれが嬉しければ幸せなことだと思います。
I think a cosplayer is someone who is happy what she or he is. Someone who enjoys making herself/himself clothes about his/herfavorite characters.


What is your next project?
秋山澪(けいおん!)/平沢唯(けいおん!)初音ミク(VOCALOID)/イギリス(ブリタニアエンジェルver)(ヘタリア).
Mio Akiyama【Keion!】/Yui Hirasawa【Keion!】/ Miku Hatune【VOCALOID】/UK(Britannia Angel version】 【HETALIA】

What advice would you give to all new cosplayers?
自分が楽しくコスプレをすることが一番大事です。私も皆さんもプロではないのですから心から楽しく活動できればそれで充分幸せだと思います。
The most important thing is to be happy when you are cosplaying. It doesn't matter if we fail because we are not professional. If you are happy, is enough.

How has your life changed now that you are considered the best cosplayer in the world?
今はコスプレは私にとってライフワークです。いろいろな作品に出会うことが出来た。又、色々な国の人と交流が持てるようになって本当に幸せです。
Costume Play is like a work for me now. Because of cosplay, I was able to meet great cosplays from different countries and that makes me really happy.


What would you tell to your fans around the world?
私も世界中の皆さんのコスプレを見ていつもとても幸せに思っています。日本のアニメを愛してくれて本当に感謝しています。私もこれからも楽しく大好きなコスプレを楽しんでいきたいです。この度はありがとうございました。
I also see many cosplays of people around the world and that makes me very happy. I wish to express my gratitude for loving (Japan) anime. Thank you.


Thank you a lot dear Arisa, for give us your time in this interview.

Visita su Blog


Paul Smith modifications - a review

As the proud owner of one of Steve Ricks’ famous Tennant Coats, it was only a matter of time and money before I commissioned him again. This time though, it was the Matt Smith look I was working on.


A bit of background: when those pictures were published of that Southerndown beach shoot in July last year, a lot was made of the tweed and bow tie. However, for me, the two most striking elements of the costume were the boots (oh those elusive All Saints...) and the shirt; such a strange but stylish pattern, when combined with the bow tie and tweed gives a strangely modern but retro look at the same time. In fact, when I first snapped eyes on the shirt I thought ‘old-man’s shirt’ - kind of knackered, charity shop style. It wasn't until you venture up close and see that design that you realise there is more than meets the eye.

My good friends on Gallifrey Base went into costume over drive and we soon worked out the various brands: All Saints boots, Topman trousers, Harris Tweed jacket and... a Paul Smith shirt. Yes PS by Paul Smith to be precise, but I was surprised.

I checked out the John Anthony website and they were selling the burgundy shirt, but only had S, M and XXL. Now if I knew what I know now about the sizing, I would've snapped up the XXL there and then, however I decided that at £55, I wanted a good fit. So I noticed an alternate colour, navy blue and grabbed an XL and was disappointed to find it was very very snug. Now I don’t consider myself a particularly large chap, but I was making this thing bulge out in a not too attractive manner! So, in the wardrobe it went for a while.

When subsequent filming shots of Matt Smith were released from Croatia (I think), he was sporting that navy shirt (he had been in burgundy up until then). I was immediately fired up to get this shirt of mine wearable. Enter Steven Ricks.

So impressed was I by his customer service and top quality work, I asked him whether he could mod my blue shirt in the MS style - the factory shirts come with little blue sleeve straps to tie the rolled sleeves back. These are removed and stitched onto the edge of the cuff to create a distinctive finish. Also, the buttons are covered by fabric on the PS shirt but not on the Doctor’s.

Steve told me to send the shirt to him so he could examine the pattern so he could prepare a reproduction and while it was in his possession, he would perform the mods. Not only that, but he said that he could also provide me with more breathing space by letting it out at the back.

When the shirt returned to me a few weeks later, it was as you will see it on screen. Finished beautifully, the cuffs are brilliant now and the buttons are visible (on a button stand I believe - am not particularly well versed in tailoring parlance). But this is the clincher - it fits like an XL now. God knows what kind of sizing Paul Smith were using for the factory shirts - I nearly went for a Large, which is what I am in a Marks & Spencer type shirt. All this for a very reasonable price.

Steve Ricks: The man is versatile, thoughtful, very amiable and communicative and above all, his final product is so worth investing in. I can now wear this shirt day to day and not worry about breathing in the whole time. Money well spent.

All I need to do now is find those damn boots...

11 shirt - Paul Smith modifications pt4

I’ve now finished the three main modifications I needed to do no my Paul Smith PS shirt to make it into a Matt Smith shirt: Breast Pocket, Cuffs and Buttonstand.

There is, however, one more modification I am going to make, which may not be strictly screen-accurate – but it’s for my own personal comfort!

The Paul Smith PS shirt is very tailored, in that it is very fitted and quite tight around the middle, being intended for a considerably slimmer frame than most normal body sizes.
The shirt I bought was an XXL, which for me is ludicrous, as I normally wear a simple L. As a result, the sleeves are bordering on being too long and the collar is slightly too big for my neck, BUT the body of the shirt is tight around me.

Having studied the shirt carefully, I realize there is an easy way that I can make it fit better. The back of the shirt has a dart on either side, taking in around and inch each side (see above).

Notice how the shirt is quite taught around my tailor’s dummy.

Because the shirt isn’t lined, these darts are simply sewn and the fabric is not cut in any way, so I can carefully unpick them and press them flat.
There will be a little scarring where the stitching was, but this will be in the back and will hopefully get lost in the pattern of the fabric anyway.

Furthermore, the centre of the back has a double-pleat, as do most dress shirts. However, a conventional shirt has just the tops of these pleats sewn at the yolk-line, allowing the folds to drop out within a few inches. The Paul Smith PS shirt does this a little differently, with a line of stitching running the full length down the back to keep the pleat sharp to the hem. My plan is to unpick this as well and re-sew the hem opened out, giving a further inch and a half across the back.

This will give me a grand total of an extra 3.5 inches across the width of the back!

The fabric is very thin and delicate, so the un-picking has to be done with care. All goes well and after doing all I intended I find the back has become a lot more loose as required.

All I then need to do is re-hem the bottom where I have released the centre back pleat (see left).

So finally I have done all the modification I wanted to do and have a shirt ready to wear  – with comfort!

You can see in the picture (see right) how loose the back now is compared to the BEFORE picture at the top of this posting (shown again, below).


So at last I now have my fully modified shirt ready to wear!
below is the burgundy version for myself.


And here is the blue version for my friend.
Look out for his Review of his shirt in a future posting.

Friday, February 26, 2010

A Cosplay interview with Taiga (Tora Dora)

Following my last Cosplay Interview with reifes88 and his Iron Tager, I have another TIGER to introduce to everyone in the year of the METAL TIGER (Chinese horoscope) !!!!

Yes, its everyone male Otaku’s favourite animal girl; Taiga Aisaka !!


Blehhh I suck so much at interviewing. I promise I’ll do better next time T_T

20sept09_GCA 043


I met KuroHoshi’s Taiga at the GCA event last year and she totally owned the crowd! Whenever she starts posing a wall of photographer appears xD

KuroHoshi was really cute and natural when I interacted with her, MOE much! Her love for the character shows through even though she didn’t make the costume herself but its clear she really loved Taiga and knew the character inside out.

 20sept09_GCA 041

20sept09_GCA 039 copy

How can anyone resist her???? Check out her wordpress if you wanna know more of her =)

Thursday, February 25, 2010

11 shirt - Paul Smith modifications pt3

Today I tackled the buttonstand on the Paul Smith PS shirt, and found sometimes things are easy, and sometimes they are not!

The shirt Matt Smith wears, although it is a Paul Smith PS shirt, has visible buttons when it is worn (see right).
Studying the pictures, the buttonstand needs to be a full three columns of squiggles wide, lined up accurately on either edge (see right, inset). So I need to bear this in mind when I am reworking the fabric available.

The original shirt has a concealed buttonstand, making a very clean line (see left).

Sometimes these concealed stands are tacked halfway between the holes to help keep it in place, but thankfully this shirt does not have that, which should make things a little easier.

This is very simply created with a single line of stitch which basically forks the shirt front into two equal width fold: the lower has the buttonholes; the upper hides them from view.

The best way to show how the fabric is folded and sewn is in this diagram (see left).

I have a couple of shirts to do modifications on, one for myself and a couple for friends. Mine is a XXL shirt, and both of my friends’ ones are XL in size.

Before starting work I need to take a little time to look the shirts over and asses what to do and the current structure of the shirt.
To my surprise I noticed something curious, and a little annoying!

My XXL shirt has the buttonstand’s edge lining up with the edge of the column (just the way is needs to be) (see right), but both the XL sizes has it breaking a column in half (see far right).
This makes my work a little harder, since it means I cannot use the existing buttonholes for the XL size, and my approach for each will be very different.

Either-way, I need to unpick the existing placket to see what I have to work with. There is a single line of stitch which makes this, and I need to release the top and bottom so I can press it out flat (see left).

Now what I do depends on how the shirt was originally made.

Buttonstand for XL
Both the XL shirts I have have the pattern falling in exactly the same place, with the edge of the existing buttonstand cutting a column of squiggles in half. This renders the existing buttonholes useless to me.

I therefore have to cut them clean off, which I do as close to the holes as I can (see right).

I then press everything out flat and see where the column of squiggles line up with the front of the collar stand, as this will determine where I start from. I can then press the left edge of the new buttonstand and the width of it to three columns wide.

All I then need to do is pleat what is left to create an edge between the new buttonstand and the shirt front.

It was difficult to show this in photos, but I have done another diagram to show what I mean (see above). This is what I am aiming to achieve for both sizes of shirts.

I then had to re-sew the buttonholes through the new stand I had created (see right). I kept the discarded strip of original buttonholes and use this as a position guide.
For my own reference my settings on my buttonholer were:
 Length=halfway Bight=H Space=A.

The finished result came out pretty well (see left).


I am very pleased that the front edge of the buttonstand lines up perfectly with the collar stand.

The second XL shirt I had to do modifications to was the alternative blue version, which Matt Smith has been seen wearing in some of the later episodes, as well as the new series teaser trailer.

Buttonstand for XXL
The XXL shirt has the existing buttons in the right position, so this one is a little easier to do.

Again I unpick the existing buttonstand and open it out to reveal as much fabric as possible, which I then press out flat.

I then fold and press the edges of the new buttonstand to three columns of pattern, with the existing buttonholes in the centre.

It is then a relatively simple process to re-pleate the rest of the edge to create position the new buttonstand in the correct place, following the above diagram as closely as I can. This is stitched through all layers to the front (see right).

It does, however, finish with the edge just short of the collar stand (see left), but this isn’t visible when the shirt is buttoned up.

D.N.Angel: Hiwatari Satoshi

d.n.angel cosplay - hiwatari satoshiThe police commander in charge of capturing Dark, Satoshi graduated from high school at the age of 8, and college at the age of 13. He enrolled in Daisuke’s middle school as he knew Diasuke was Dark’s alter ego. Although most people find him cold and distant, Daisuke insisted that they become friends.

This is Hagaren, the same cosplayer as X/1999’s Monou Fuma. When I first saw this on Deviant Art, I immediately fell in love with the photo, so I had to feature it here!

Important Announcement!

cosplay holic banner

Please take note that Nanao's Cosplay Research may be closing down soon! New cosplays will be added on Cosplay Holic from now on. Thanks for everyone's support! Watch out for more cosplays here on Cosplay Holic!

Wednesday, February 24, 2010

Vocaloid: Meiko

vocaloid cosplay - meikoOne of the first Vocaloids created by Crypton Future Media, Meiko’s voice is based on a Japanese female singer, Haigou Meiko, whose singing is suitable for any musical genre. The anime character added on the box of the DTM (Desktop Music) software had nothing to do with the singer’s image, but her appearance had an appeal to the mainstream audience, selling the software quite well.

Beautiful cosplay! I love how she did her make-up and nails in Meiko’s signature red color. I wonder if this cosplay is from one of her music videos? Thanks to Lilica for sending this!

Tuesday, February 23, 2010

Kuroshitsuji: Sebastian Michaelis 04

kuroshitsuji / black butler cosplay - sebastian michaelis

A demon and a butler, Sebastian Michaelis formed a contract with Ciel Phantomhive to abide by his master’s will in exchange for his soul. He is required to do whatever Ciel commands, including becoming his personal bodyguard. Sebastian bears a striking resemblance to Ciel’s late father, Lord Vincent Phantomhive.

Awesome cosplay! And that blurred hand… do you think that’s blood on his glove? Thanks to Bailiff for sending this in!

Usagi Tsukino - Progress II

So today I got a bit on the blouse. I finshed the collar and the sleeves. The sleeves might have been getting a bit big, but I still like them so I guess I won't do anything about it. All that is left now is to attach the collar and the hem. Just click on the photos for close up.


Left to do: attaching the collar on the blouse and the hem. Sew the skirt and buying the wig and shoes.

Just Be Friends Cosplay PV (Behind the Scene)

Below is a JBF Behind the Scene Video I put together. Sadly, as Youtube only allowed 10minutes of airtime, I didn’t include day two of the filming into this video. Would you guys be keen on watching how we did all the flashback memories?

Couldn't embed and Show this video in the previous post about Post Production because Blogger doesn't allow video embeds to show on the top when you have an entry cut @_@


Just Be Friends Cosplay PV ( Production Diary )

Hi Peeps!
I’m back again with something related to JBF. I know you guys must be so tired of me/us with the same serie/song again. But please bear with me alright ^^?


So, I was very inspired by the Production Diaries Peter Jackson did for the KongisKing.net fansite and halfway through the post production of JBF. I decided to keep some simple sort of diary to chronicle this very long and arduous journey and started writing twitter style emails and blogs to myself and have complied them below. Click on the link to read more =)

The teal coloured words are written AFTERWARDS to fill in the blank period where I had forgotten to chronicle. And as can be seen from the start date, I did these diaries very late into production …much apologies ^^;; I have soooo much to say about the post production but…guess I’ll shut up for now. Let me know if you guys liked it!


17th Jan
It is now 4.08am and I have just stepped out of bath. It has been a long and hard Saturday of non stop photos editing and animating. The TV was on almost the entire day and I’ve even watched reruns of the same show from the afternoon slots to the late night slots ahah.
Yes, it had been a very long day.
But on the bright side, I’ve completed almost all 60% of the second half of the song (I split the animation of the 2ong into 2 parts for easier handling). Finally got the audio and animation to synch reasonably….well at least it does so on my PC. When I sent the first swf file to reiko it didn’t worked for her =\
Okay, back to finish up as much stuffs as I can. Gotta do something about the ‘kissing paper plane’ scene. Sigh…didn’t managed to get any nice pics that day so…really need photoshop to help save the day =(
D3P_3650copy3_1_thumbD3P_3830copy_thumb
Some pics that were manipulated today.

19th Jan
Omg damn happy! Edging closer to the ending soon!
Finally got pass the parts with their numerous memories photo. And got the sound to sync!!!
Still a lot to be done though. Gotta sing the song and edit the swf in Ulead. 

20th Jan
Just went out for dinner with kns and cvy. While walking back, Cvy started pimping a nico singer's just be friend recording to us. Ballad male version. 

Which got me slightly depressed about the massive delay in our own project.

22nd Jan
Am very very very very upset and frustrated to the point of tears. I just lost my entire flash working file. Yes, lost it. The bloody system deleted it.

I was loading some photos into the Flash document when my mom who was mopping the floor accidentally knocked into the cables of my external HDD. And that jerk kinda broke the whole connection and caused flash to crash. I tried to save a copy of the document but it wouldn’t allow me.

What puzzles and bewilders me is how it deletes the entire file! I mean, it didn’t just not save the new changes. BUT it literally deleted everything! I can’t even find the file on my ext HDD!
Very very upset. I’ve just installed a recovery program….hopefully it can find the file back. I’m not very hopeful but…sigh. I wish I have a better system and I wish the bloody connection between the Ext HDD and PC is not so fragile! ARGH!!!!

This just made the journey 1000 times more difficult. I’m already nearing the completion of the pv and this happens… totally can’t believe it.


DSC_0452copy_thumb8

23rd Jan – 4th Feb (unclear timeline)
Reiko and I spent the next few days searching online for free Data recovery programs. I tried out a few and the last one (Recuva) kindly recommended by Zeratul worked. But the FLA file recovered was corrupted and could not be used at all.
We then realise the video editor wasn’t working with the SWF file. It wouldn’t load some scenes and showed red screens instead of photographs. Either that or the animation would be totally out of its designated path.
I had initially wanted to do the animation in Flash and then export it as a AVI file. But ran into a lot of issue with that because the files were just too heavy and Flash kept crashing.

5th - 7th Feb

image

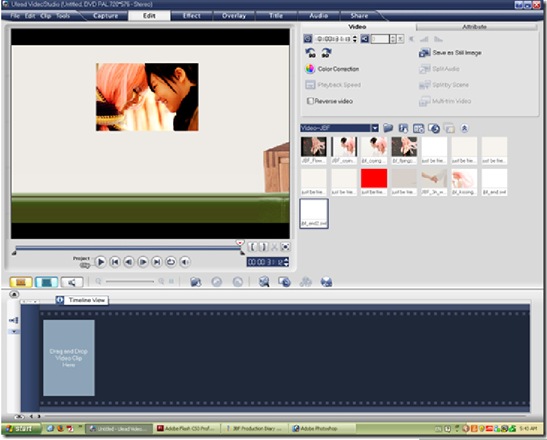
With the original idea of using SWF animation out of the window now, I started doing the animation manually inside Ulead Video Studio. But the effects were less than desirable as the program blurred the photographs immensely.


8th Feb
spent my whole waking day trying to fix the swf to work with ulead. Kinda found that maybe we can work around the swf problem and import bit by bit. 

The funny thing is, its so temperamental even with my flash experience i cant diagnose why it isn't working when it should!  One moment its working, i make some necessary changes and the next moment it jus blanks out ! Super frustrating!!

10th Feb
10022010661
This whole process of going from flash to ulead and occasionally jumping back to photoshop is getting so exhausting. Perhaps more mentally than physically. Even though my eyes feel really strained and tired. 

But yeah, so tired of ulead not working with flash. Whyyyy??? My simple tweens are not working and i have not idea why. I've gone into photoshop to resize and compress the same pic at least 3times but its still not working.

Oh god!
10th Feb
19feb2 copy

This is seriously annoying. Spent the past 1 hour or so just troubleshooting this damn scene! I’m finally at the final stages where the screen zooms out and shows the stunned face of the emo boyfriend.
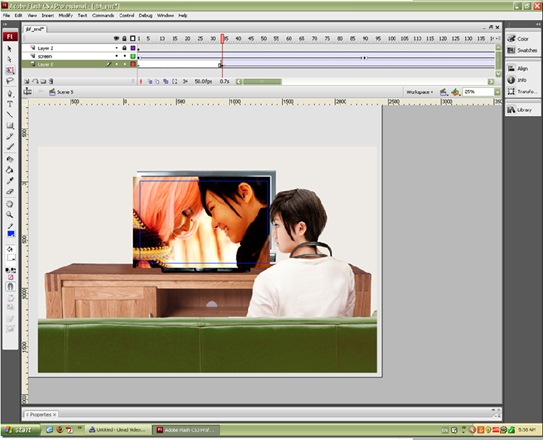
After tediously Cging that photo out (we had forgotten to shoot it) and animating it in flash; Ulead refuses to load the animation properly. Instead of loading the middle portion of the photo, its loading the extreme side of it……screwed=_=

I’m gonna compress the photo again in Photoshop for one last time today before I go to bed. hopefully it’ll work…..because if it doesn’t, I don’t know what can. I’ve done all I can think of.
Each time I recompress/edit the photo. I have to go through this process of re-importing the edited photo into Flash, replacing the old photo with the new, sometimes make a new layer, tween it, adjust the keyframes to fit the middle lovey dovey photo, export the swf , update the swf file in Ulead and then check if the animation is working.

I bet you got tired just reading about it=_=U

10feb

6:08am : YEAY! It worked! I’m off to bed!!!

10th Feb (PM)
Omg 4 more days to stipulated deadline!! Still blogging via mobile because I don't wanna overwork my Pc. 
Really hope we wont miss this deadline yet again...especially since 14th feb is such a morbidly and ironically suitable date for this pv. 

Am down to the credits page already wheeeee!!! Just jumping back and forth from flash and ulead to make sure everything is time perfect. 

Really looking forward to completing it so I can dedicate more time to other stuffs. Still have not spring cleaned x.x

10022010664

11th Feb

11022010665
Okay...doing a check to make sure all the pics load properly. Which they didn't. I seriously need better work station sigh...
But i think i don't care already...gonna go ahead and try exporting a trial video and see how things go.  AAArgh! Export got truncated because Ulead just crashed =.=. Screw it. I'm exporting as mp4 this time!


12th Feb
11022010667

Ahhhhhh its now the final exportinggggg ....just as i was hoping no red screen will appear... It did =_=. Ahhhhhhhhhhhhhh!!!!!! 

Trying out all sorts of export settings now. Sigh. Really hating this red screen =.=

12th Feb (PM)


12022010669


Oh yeahhhhhh coming to the reallll FINAL exporting and checking! Also managed to overcome the obstacle of the export video being stretched vertically. It was in the form of an optional tick.
Family has been up and cleaning the house way before I woke up. Feeling quite guilty to see my mom running around the house cleaning while I continue to sit on my chair mending this=.=
Alright the export is running by itself. I'm finally free to handle the other things in my life! Ciao!

12th Feb (PM)
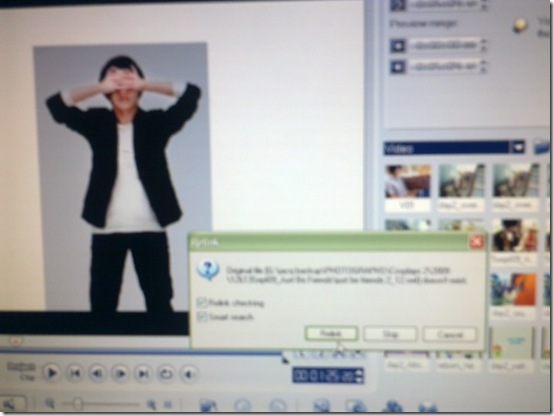
I have officially finished everything for the video. All the animations that could be done is done.But no celebrations yet because my bloody system and ulead can't export the video properly. The red screen just keeps appearing, sigh. I've restarted my pc countless times and the problem persists.
Arghhhh i'm so losing my patience and interest in this! Why must this whole thing be so cumbersome??? Why can.t simple thing jus work wellll ????

12022010668

====================================================================================

Okay. so for the most part, I’m complaining hahaa. But you seriously can’t blame me! There was so much going against me and so much curves to overcome. Almost until the very last moment, I had thought I wasn’t gonna make it.

I had just gotten so accustomed to failures I really started becoming very pessimistic. And almost every working moment I was asking myself “Why the HECK am I doing this?!”. I really wanted to give up but couldn’t bring myself to do that because I’ll be disappointing everyone in the team and not to mention, it would be an utter waste of all my previous effort.

I’m just really happy we managed to meet our deadline and successfully showed the world our effort. And when the video finally went live I was like OMFG ITS DONE!!!! LIKE FOR REAL! The hearty response was truly unexpected. Many thanks to all those who liked this PV. *kisses*